最近做了个项目,需求如下:
1、有许多图纸(pdf) 文档,需要通过AI聊天,查到相关图纸;
2、需要支持语音识别(业务机器只有cpu机器);
3、LLm模型(显卡只有一个4090)要求绝对不能出幻觉;
我初步探索下来,发现几个问题:
- 文档大致有 500G的pdf图纸,大部分是影印版本(图片),很难正常解析
- 语音识别要支持cpu,需要选最快最好的asr
- 大模型最多只能32b模型,要避免幻觉就得设计的足够简单可靠
技术选型
pdf 解析识别,使用 ocrmypdf + pdftotext (资源有限)
语音识别,使用 SensVoice-small cpu版本
LLM模型,采用qwen3-32b
工作流引擎,采用dify-1.11.0-fix版本
实践落地
第一步: 先做个后台,用于图纸的处理–文档批量上传+解析;
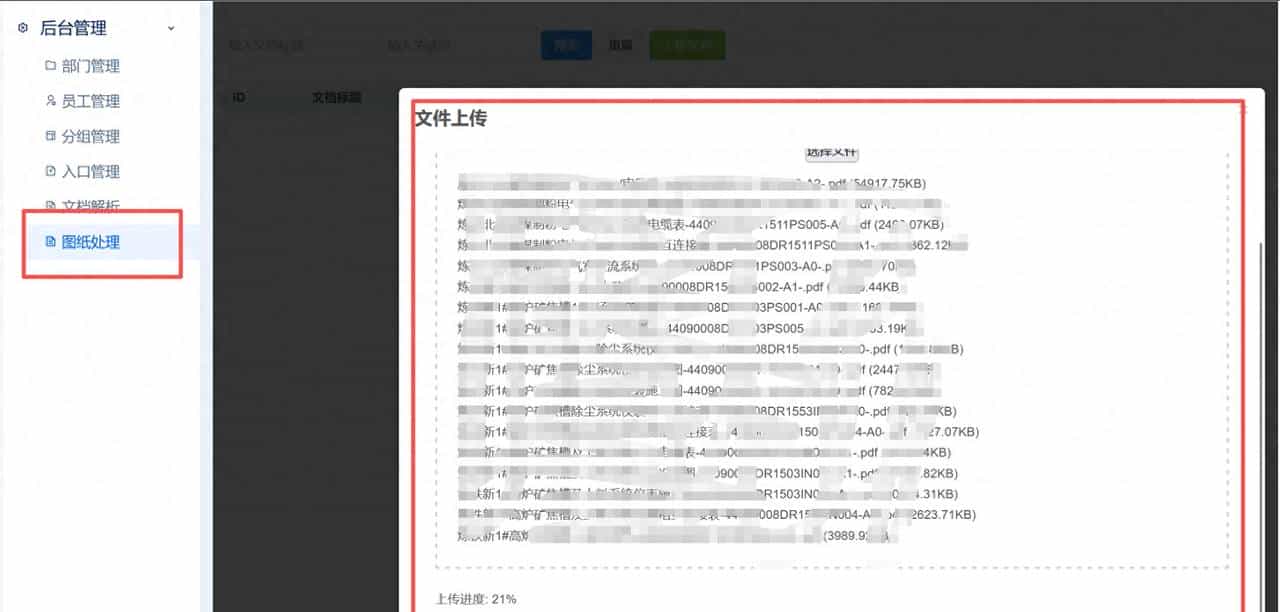
文件上传
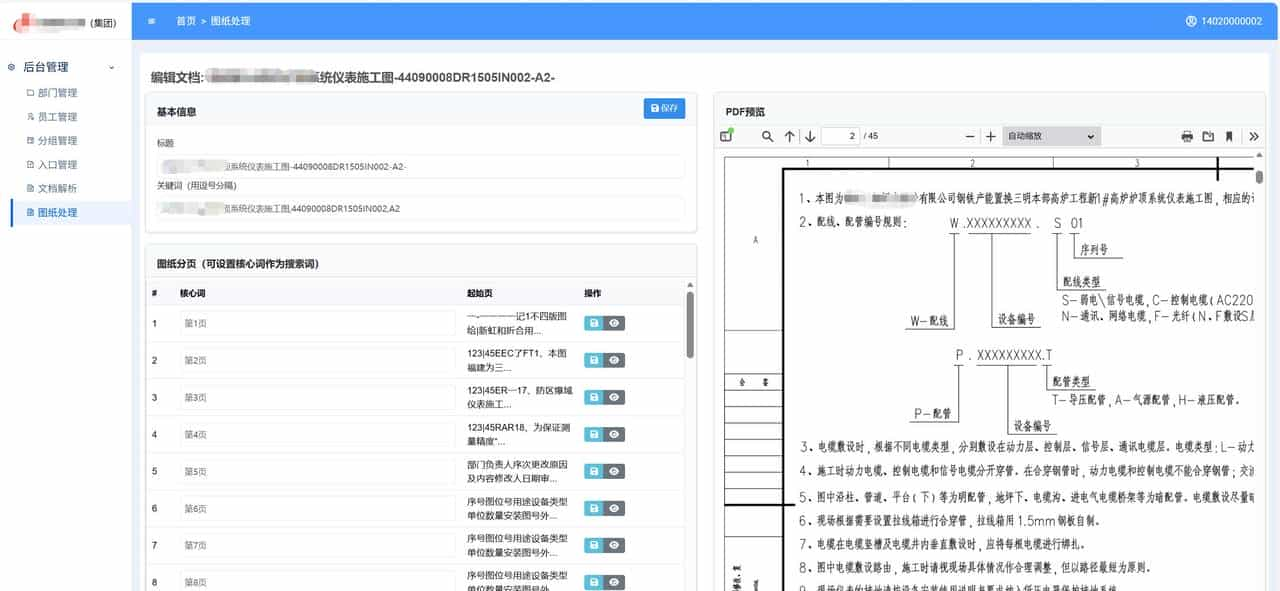
分页编辑&结构化
把pdf 按页解析成文本;这里面有个设计思路:
- 文档命名要正确,名字代表文档的作用,会拿来做关键词匹配和向量索引;
- 每一页都解析成文本,将文本和”第几页”关联起来,目的是溯源,跳转到pdf的相关页面
- 每页增加核心词(可以不填),用于特殊标记重大的页面,通过关键词和向量索引查核心词
- 每一页的解析文本通过关键词匹配查询
这样每个pdf文档,都会被解析成 documents 和 document_chapter 两个表,表结构如下:
-- 创建 documents 表
CREATE TABLE documents (
    id SERIAL PRIMARY KEY,
    title VARCHAR(500) NOT NULL,
    unkey VARCHAR(32) NOT NULL UNIQUE,
    keyword VARCHAR(1024),
    catalogues TEXT,
    otitle VARCHAR(500),
    file_type VARCHAR(10) DEFAULT 'pdf',
    size BIGINT,
    txt_path VARCHAR(500),
    pdf_path VARCHAR(500),
    status INTEGER DEFAULT 1,
    modified TIMESTAMP DEFAULT CURRENT_TIMESTAMP,
    embedding vector(1024),
    user_id INTEGER DEFAULT 0,
    conf_id INTEGER DEFAULT 1
);

-- 为 embedding 字段创建向量索引
CREATE INDEX documents_embedding_idx ON documents USING ivfflat (embedding vector_cosine_ops);

-- 创建 document_chapters 表
CREATE TABLE document_chapters (
    id SERIAL PRIMARY KEY,
    art_id INTEGER NOT NULL REFERENCES documents(id) ON DELETE CASCADE,
    catalogue VARCHAR(500),
    keyword VARCHAR(1024),
    start_page INTEGER,
    end_page INTEGER,
    content TEXT,
    embedding vector(1024),
    created TIMESTAMP DEFAULT CURRENT_TIMESTAMP,
    modified TIMESTAMP DEFAULT CURRENT_TIMESTAMP
);

-- 为 document_chapters 表创建索引
CREATE INDEX document_chapters_art_id_idx ON document_chapters(art_id);
CREATE INDEX document_chapters_embedding_idx ON document_chapters USING ivfflat (embedding vector_cosine_ops);

-- 可选:为 keyword 字段创建索引
CREATE INDEX document_chapters_keyword_idx ON document_chapters(keyword);
CREATE INDEX documents_keyword_idx ON documents(keyword);

-- 可选:创建复合索引以提高特定查询性能
CREATE INDEX document_chapters_page_range_idx ON document_chapters(art_id, start_page, end_page);
第二步,来安装个语音识别引擎:
#1.创建python虚拟环境
conda create -n sens python=3.9

#2.下载代码
git clone https://github.com/FunAudioLLM/SenseVoice.git
cd SenseVoice
pip install -r requirements.txt

#3.生成服务
import os
import tempfile
import traceback
from fastapi import FastAPI, File, UploadFile, Form
from fastapi.responses import JSONResponse
from funasr import AutoModel
from funasr.utils.postprocess_utils import rich_transcription_postprocess

app = FastAPI(title="SenseVoice ASR Service", description="High-performance ASR using SenseVoiceSmall")

# --- 模型初始化 ---
model_dir = "iic/SenseVoiceSmall" # 也可以改为本地绝对路径

print(f"正在加载 SenseVoice 模型: {model_dir} ...")
try:
    model = AutoModel(
        model=model_dir,
        trust_remote_code=True,
        # remote_code="./model.py", # 如果本地有修改后的 model.py 则开启
        vad_model="fsmn-vad",
        vad_kwargs={"max_single_segment_time": 30000},
        device="cpu", # 如有 GPU 可改为 "cuda"
    )
    print("✅ 模型加载成功")
except Exception as e:
    print(f"❌ 模型加载失败: {e}")
    traceback.print_exc()
    model = None

@app.post("/v1/audio/transcriptions")
async def transcribe_audio(
    file: UploadFile = File(...),
    language: str = Form("auto"),  # SenseVoice 支持 auto, zh, en, yue, ja, ko
    use_itn: bool = Form(True),    # 是否开启逆文本标准化(转数字、符号等)
):
    try:
        print(f"[DEBUG] Received file: {file.filename}, language={language}")

        if model is None:
            raise RuntimeError("SenseVoice model not initialized.")

        # 1. 保存上传的音频到临时文件
        with tempfile.NamedTemporaryFile(delete=False, suffix=os.path.splitext(file.filename)[1]) as tmp_file:
            content = await file.read()
            tmp_file.write(content)
            tmp_path = tmp_file.name

        # 2. 执行推理
        # SenseVoice generate 返回的是列表
        res = model.generate(
            input=tmp_path,
            cache={},
            language=language,
            use_itn=use_itn,
            batch_size_s=60,
            merge_vad=True,
            merge_length_s=15,
        )

        # 3. 后处理(过滤 SenseVoice 的情感/事件标签,如 <|HAPPY|>)
        if res and len(res) > 0:
            raw_text = res[0]["text"]
            clean_text = rich_transcription_postprocess(raw_text)
        else:
            clean_text = ""

        # 4. 清理临时文件
        if os.path.exists(tmp_path):
            os.unlink(tmp_path)

        return JSONResponse({
            "text": clean_text.strip(),
            "raw_text": raw_text.strip() if res else "" # 保留原始带标签文本可选
        })

    except Exception as e:
        print(f"[ERROR] Transcription failed: {e}")
        traceback.print_exc()
        return JSONResponse({"error": str(e)}, status_code=500)

@app.get("/health")
def health():
    return {"status": "OK", "model": "SenseVoiceSmall"}

if __name__ == "__main__":
    import uvicorn
    # 端口设为 8001 避免与之前的 whisper 冲突
    uvicorn.run(app, host="0.0.0.0", port=8001)
# 4.启动服务
nohup python service.py &第三步,安装 qwen3-32b
conda create -n vllm python=3.10
conda activate vllm
pip install -U vllm  --pre  --extra-index-url https://wheels.vllm.ai/nightly
vllm serve Qwen/Qwen3-32B
第四步,引入dify中
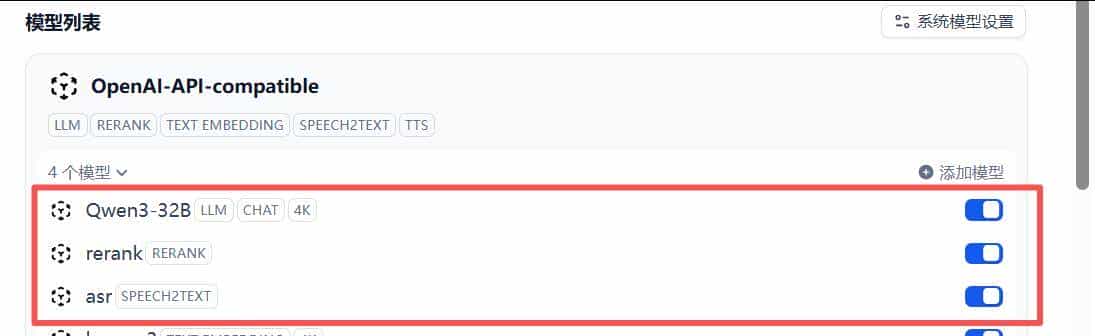
模型供应商
#配置到dify(在dify的docker配置中,加入extra_hosts 支持)
 plugin_daemon:
    image: langgenius/dify-plugin-daemon:0.1.1-local
    restart: always
    extra_hosts:
      - "host.docker.internal:host-gateway"

#配置openai接口
API endpoint URL*
http://host.docker.internal:8001/v1
第五步,配置dify工作流
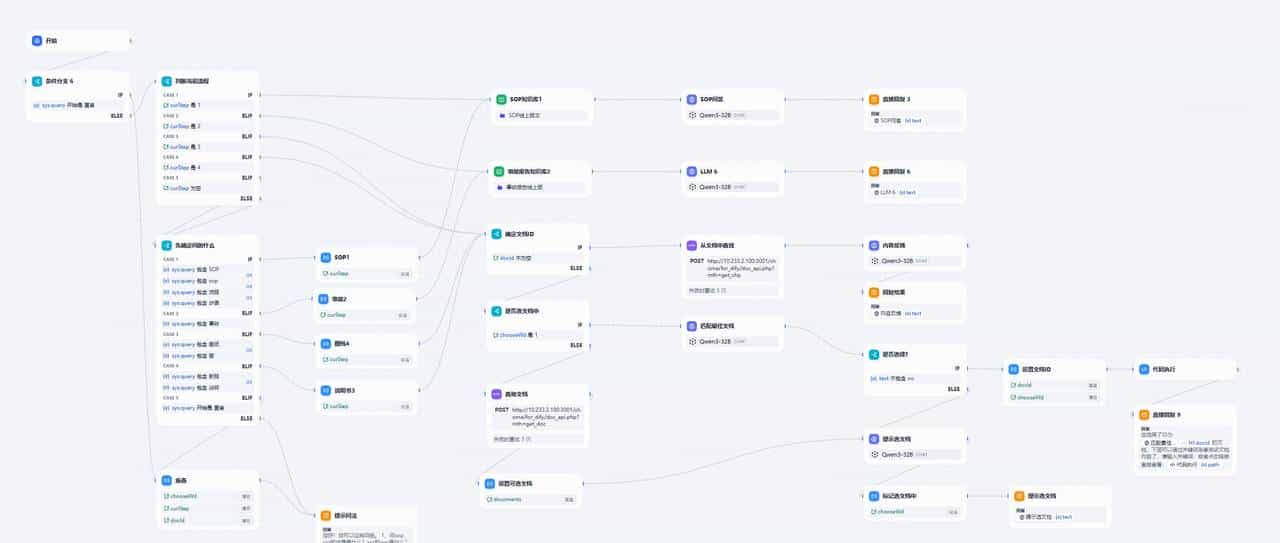
dify工作流
核心设计思想:
- 完全废弃dify的rag搜索,采用api调用方式;api通过psql方式查找结构化的表
- 先引导对话找到最相近的文档,(列出内容
- 通过语义和关键词找到指定文档的对应页面
效果展示
第一步:引导对话(或者语音对话),找到相关文档
语音对话
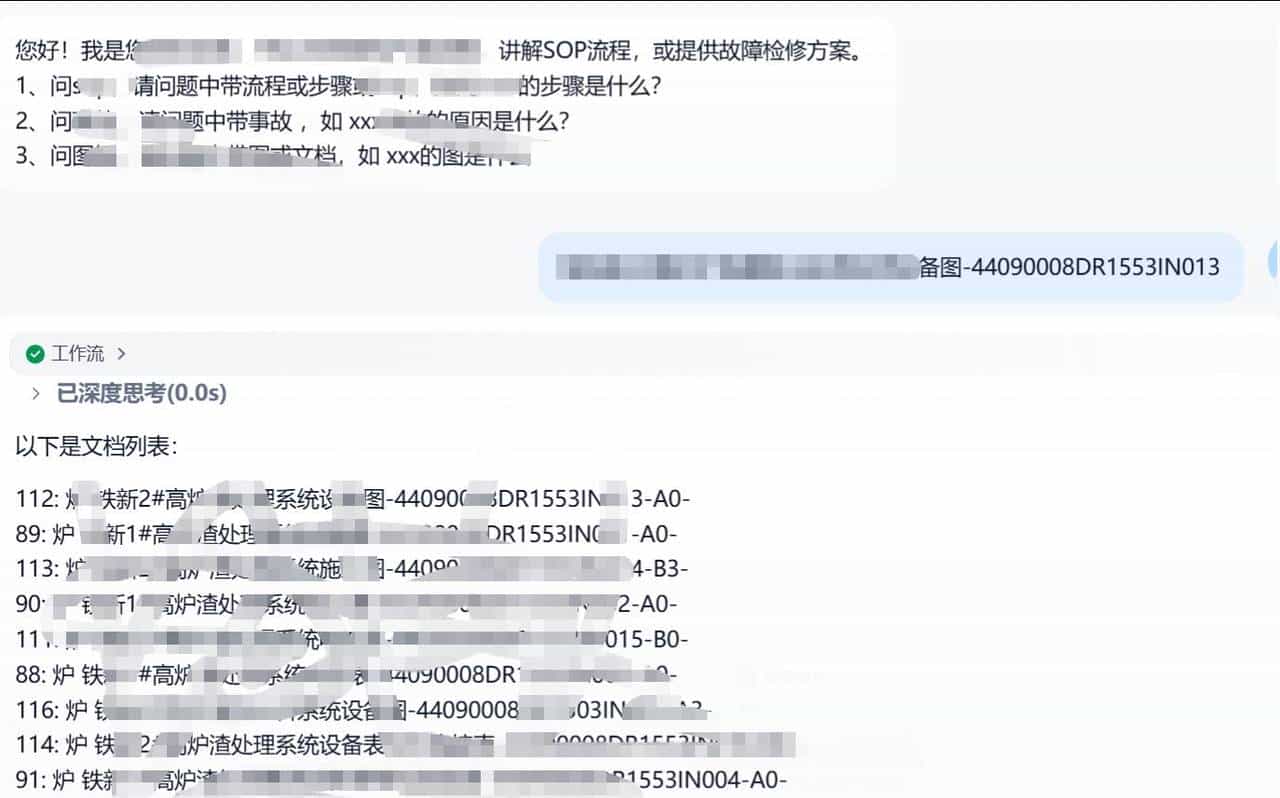
查找文档
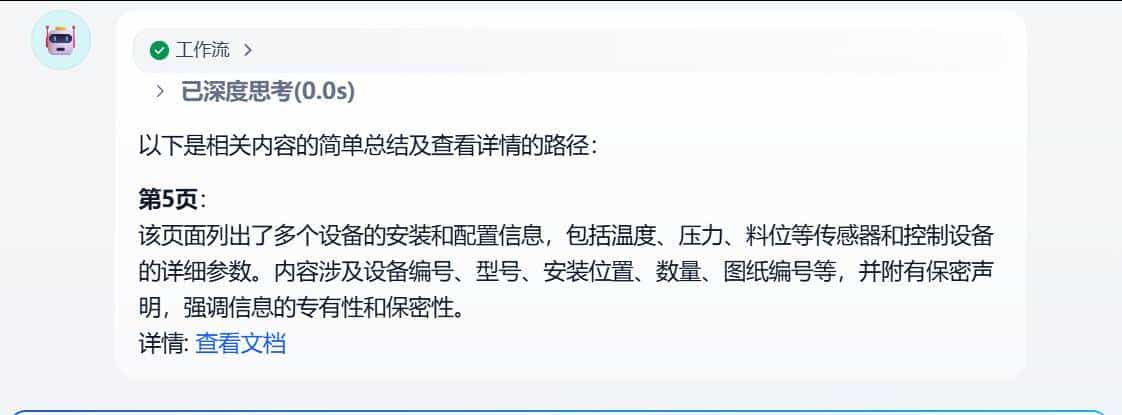
第二步:从指定文档里面做核心词索引和关键词匹配,找到对应的页面
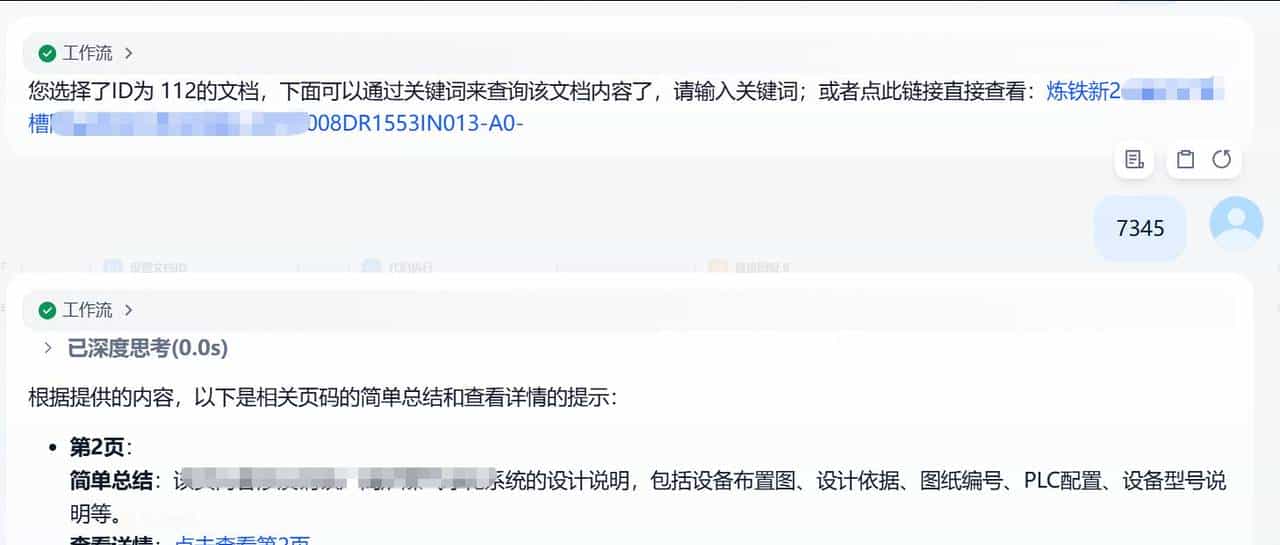
查找分页
第三步:点击链接,直接打开pdf的对应页面
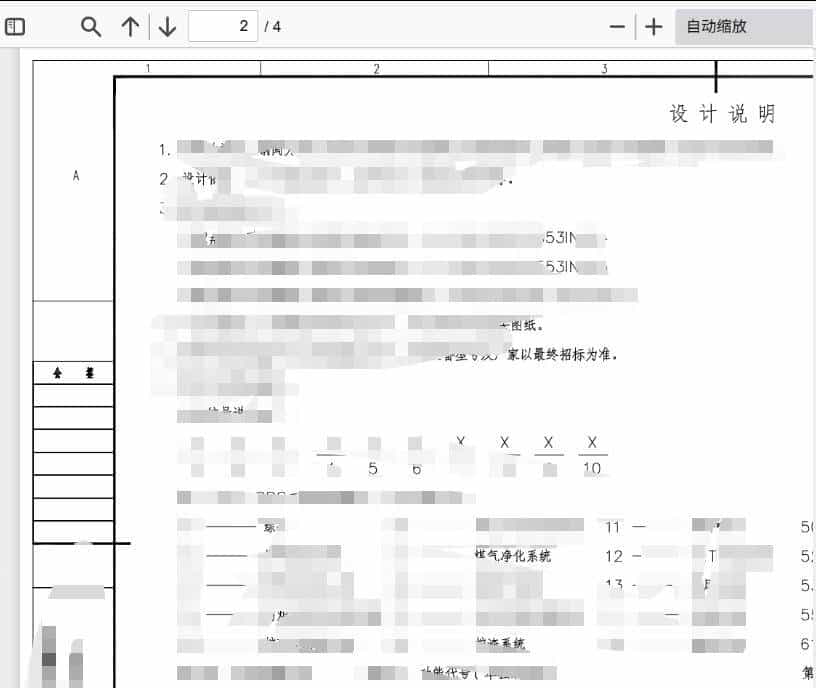
跳转pdf
以上就是整体处理方案,感兴趣的朋友可以加我深入交流;
© 版权声明
文章版权归作者所有,未经允许请勿转载。
相关文章


暂无评论...