
一、在windows系统中安装jenkins
下载jenkins.msi安装包,根据提示进行安装,略~
二、使用非服务模式启动jenkins(即交互方式运行)
交互模式深坑:在 Jenkins 中使用 MSI 方式安装后,默认会以 Windows 服务 的方式运行,而 Windows 服务默认运行在 Session 0 中(非交互式桌面会话),这会导致
pywinauto
解决方式:配置 Jenkins 以交互式用户运行,操作方式如下
步骤1-禁用当前自启动的jenkins服务(若未启动则跳过)
<CMD>
sc stop Jenkins
sc config Jenkins start= disabled
步骤2-以交互式用户启动 Jenkins
①创建一个批处理文件(如
run_jenkins.bat
<BAT>
@echo off
set JENKINS_HOME=F:Jenkins(替换为你的Jenkins安装路径)
cd /d "%JENKINS_HOME%"
java -jar jenkins.war --httpPort=8080
②双击运行此批处理文件,Jenkins 将以当前用户身份运行
步骤3-访问 Jenkins:
访问
http://localhost:8080
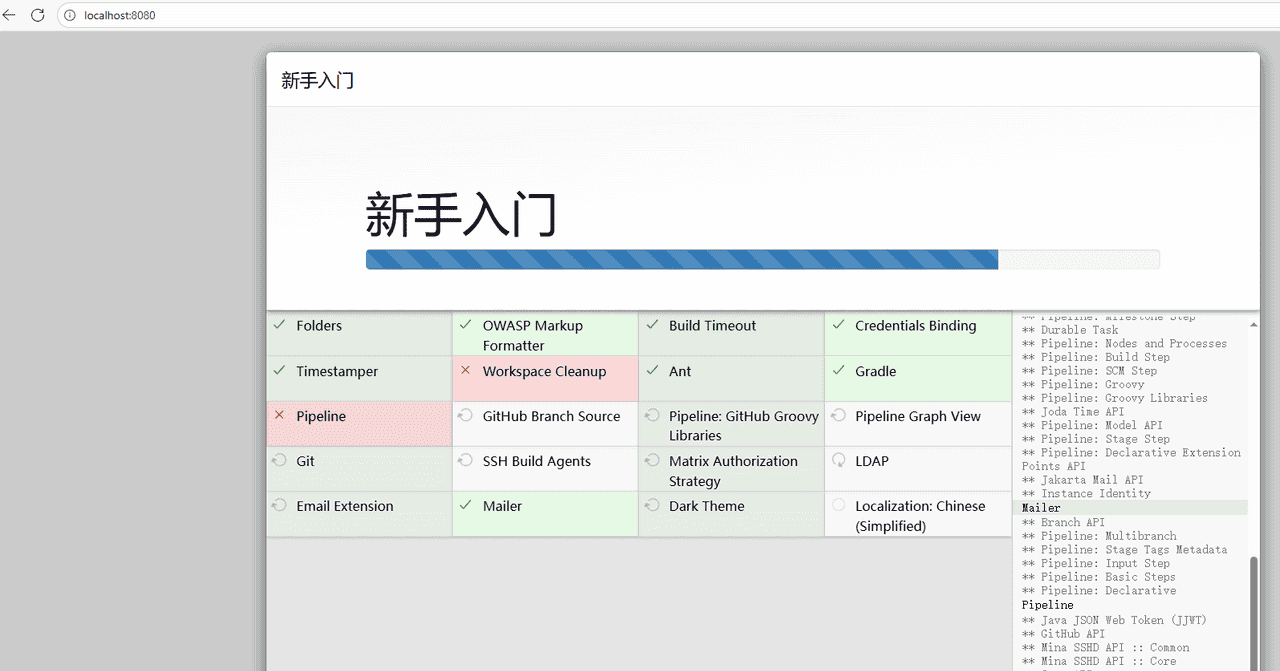
三、登录后安装推荐的插件
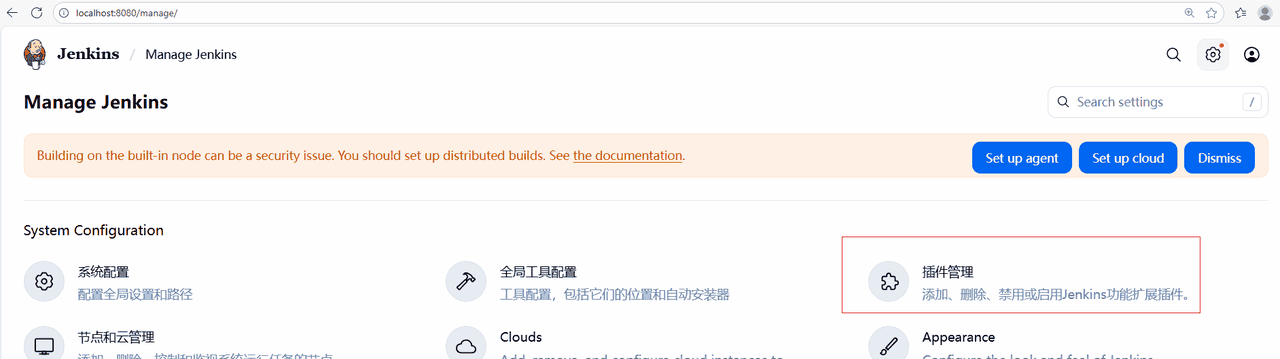
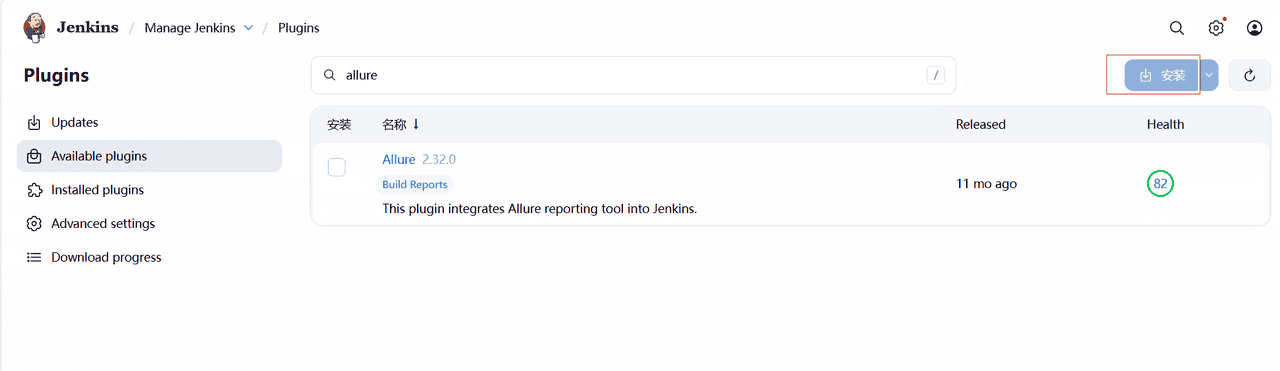
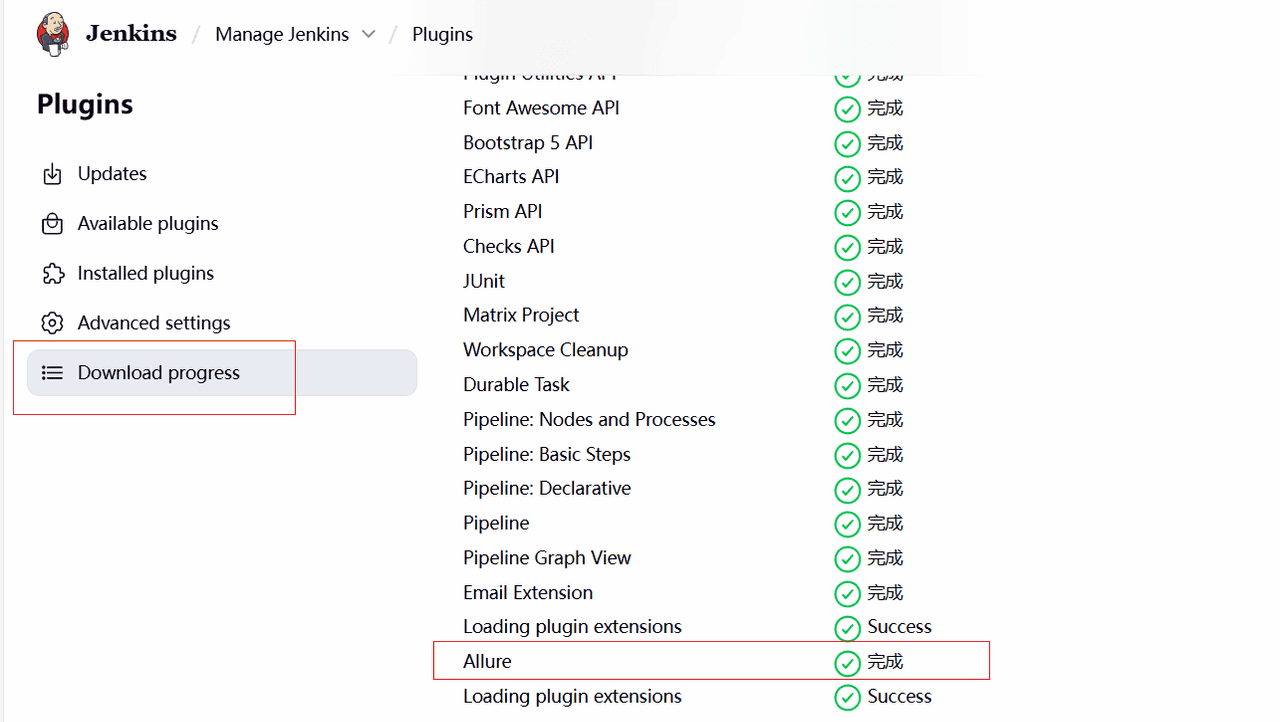
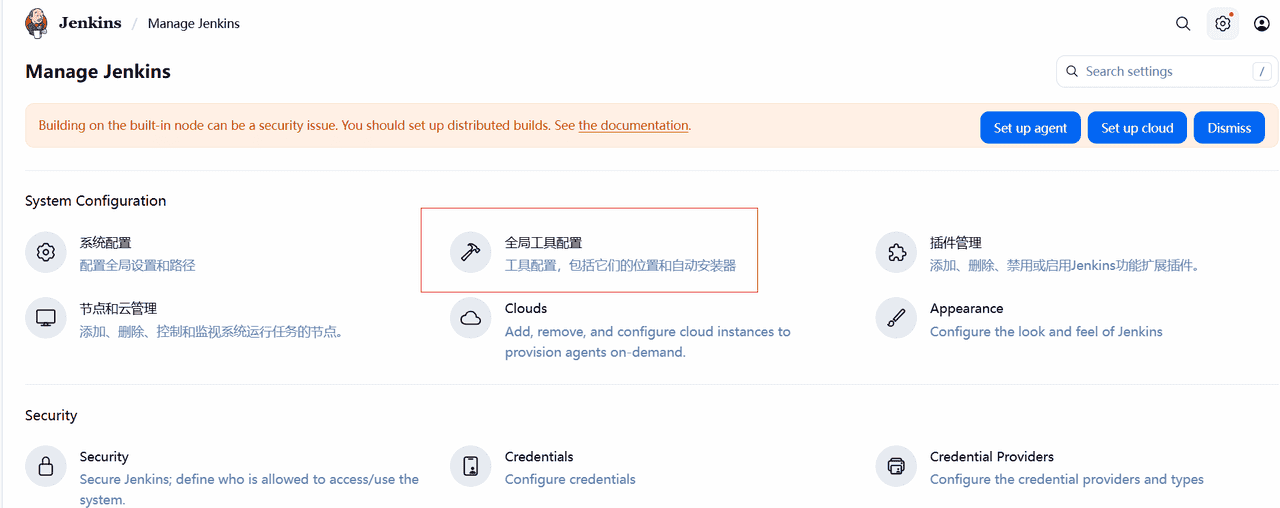
四、安装并配置allure插件(不在推荐当中)
步骤1:安装插件
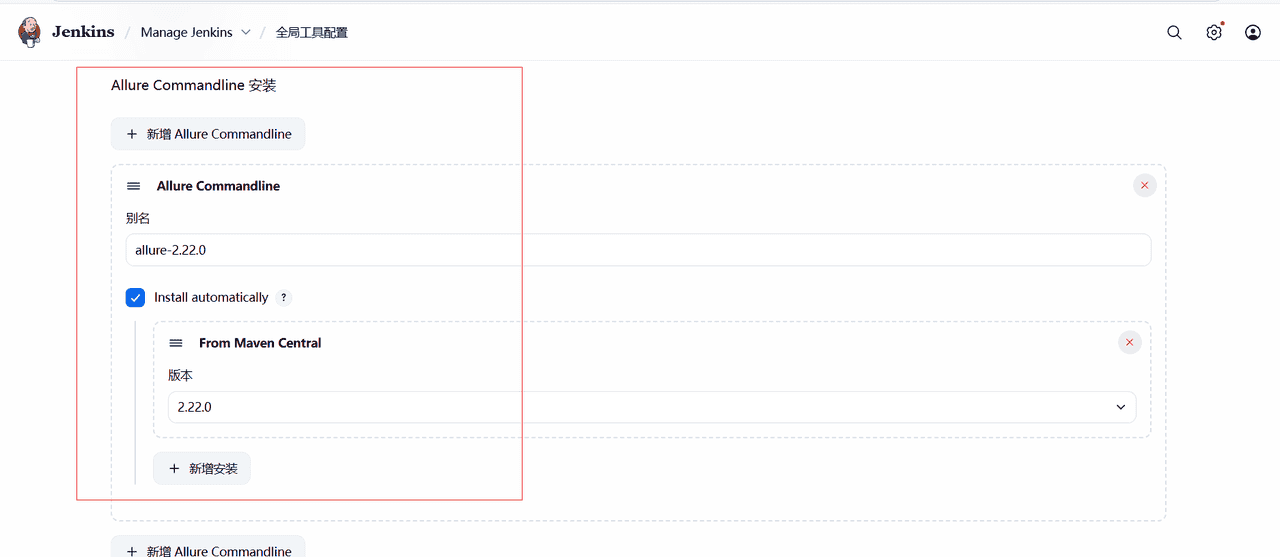
步骤2:配置allure版本(jenkins服务器上所安装的allure版本)
Allure Commandline(Allure 命令行工具)是 Allure 测试报告框架的核心组件,它的主要作用是将 自动化测试生成的原始数据(如测试用例执行结果、日志、截图等)转换为 交互式、可视化的 HTML 测试报告
五、配置CredentialsId(拉取git代码的凭证)
在 Jenkins 中,
credentialsId
credentialsId
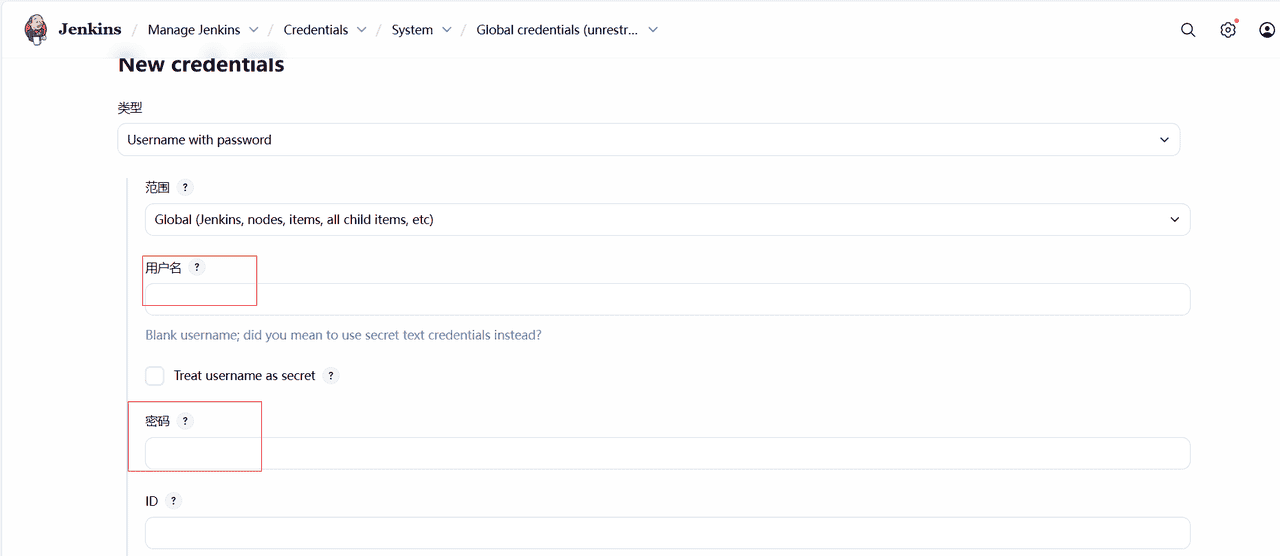
步骤1:进入凭据管理页面
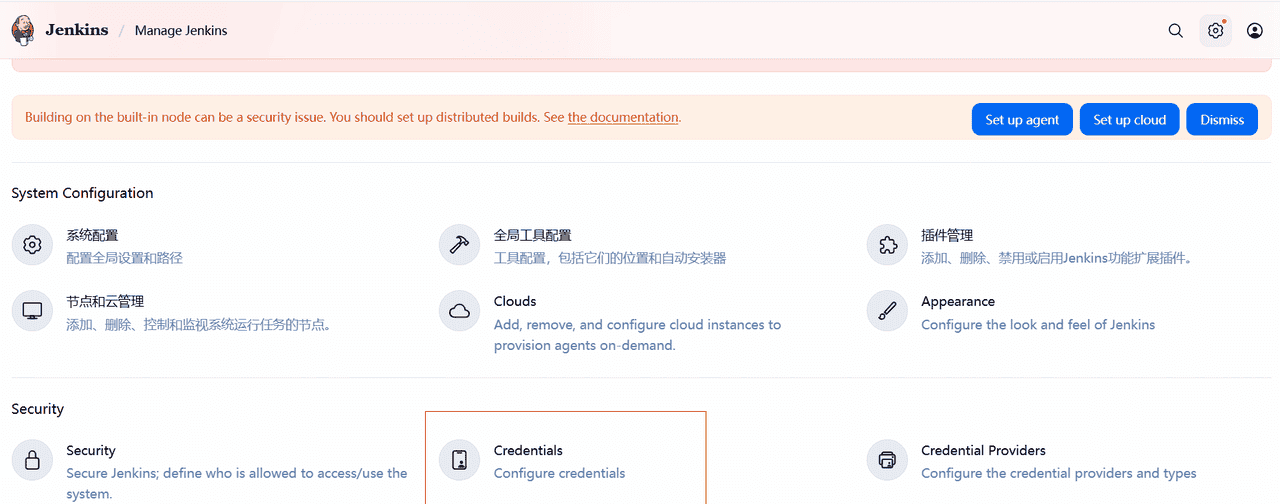
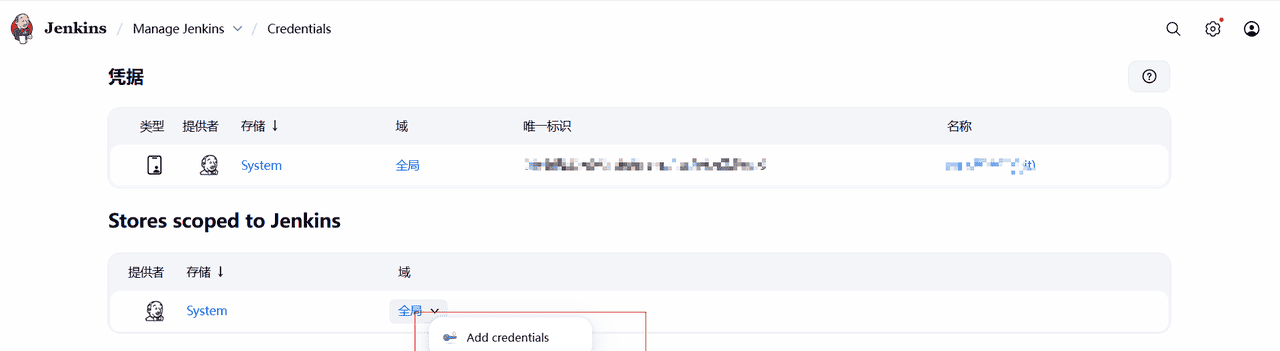
打开 Jenkins → Manage Jenkins → Manage Credentials
选择 全局凭据(Global credentials) → Add Credentials
步骤2: 填写 Git 凭据信息
根据你的 Git 仓库类型(GitHub/GitLab/Bitbucket 等),选择以下认证方式之一:
A. 用户名 + 密码(HTTP/HTTPS 仓库)
Kind:
Username with password
Scope:
Global
Username: 你的 Git 用户名(或邮箱)
Password: 你的 Git 密码(或 Personal Access Token)
ID: 可留空(Jenkins 会自动生成),或手动输入一个易记的 ID(如
github-username-password
Description: 可选描述(如 “GitHub HTTP Credentials”)
步骤3: 保存后获取
credentialsId
credentialsId
保存凭据后,Jenkins 会分配一个唯一的
credentialsId
你可以在凭据列表中看到它:
自动生成的 ID:类似
c4e3a1bb-2f7d-4a9f-8c1d-6e2f9b8a0c7d
github-username-password
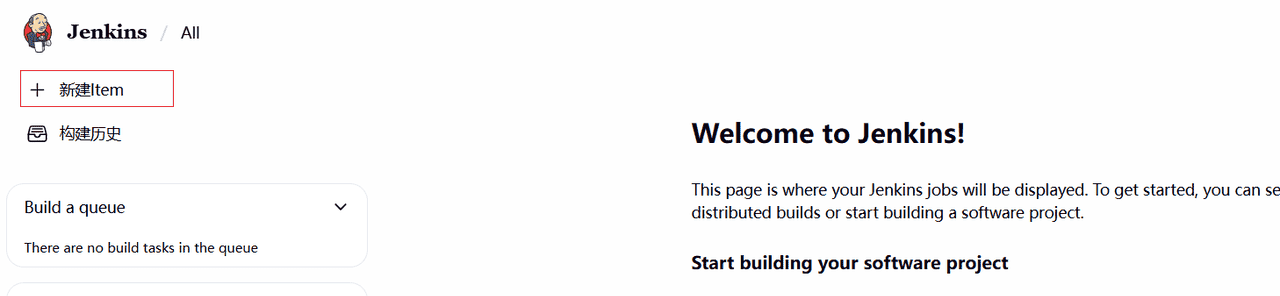
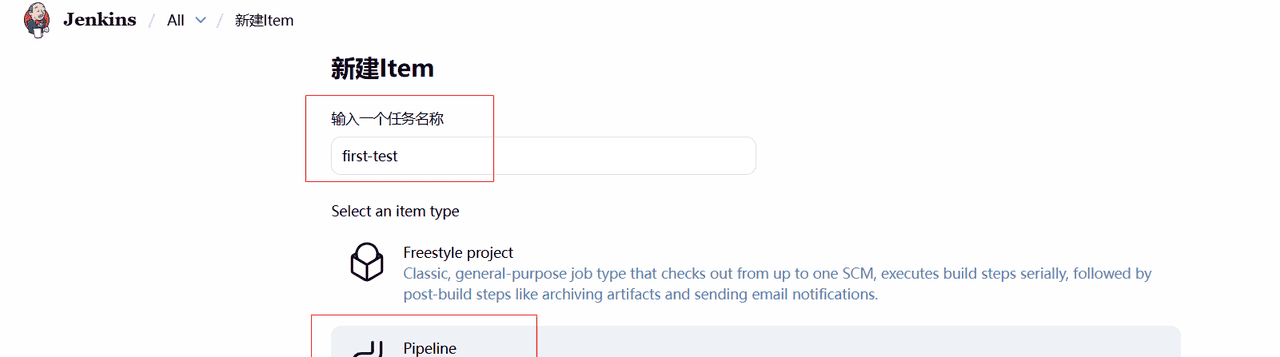
六-创建【Pipeline】流水线项目
步骤1:创建流水线项目
步骤2:编写流水线脚本(声明测试环境——>拉取git项目——>运行python-pytest-ui自动化脚本——>生成allure报告——>清理测试环境)
pipeline {
agent any
environment {
PYTHONE_HOME = 'D:UsersPythonPython310' # 替换为你的python安装地址
ALLURE_HOME = 'D:Usersallure-2.22.0bin' # 替换为你的allure安装地址
PROJECT_DIR = 'F:jenkinsworkspacefirst-test' # 替换为你的jenkins安装地址和流水线项目名称
PATH = "${PYTHONE_HOME};${PYTHONE_HOME}Scripts;${ALLURE_HOME};${env.PATH}"
}
stages {
stage('Checkout') {
steps {
// 从 Git 仓库拉取代码
git branch: 'main', credentialsId: '02b68fa6-5002-4d6e-a5d2-xxxxx', url: 'http://localhost:3000/root/zzzzznnnn.git'
}
}
stage('Setup') {
steps {
// 打印 Python 和 Allure 版本,确认环境变量配置正确
bat "python --version"
bat "allure --version"
}
}
stage('Run Tests') {
steps {
// 运行 Pytest 测试,生成 Allure 报告
// bat "pytest -v testcasetest_universal_functest_alarm_func.py --alluredir=allure-results" # 替换为你需要执行的python文件
bat "pytest -v testcasetest_note.py --alluredir=allure-results"
}
}
stage('Generate Report') {
steps {
// 使用 Allure 生成测试报告
bat "allure generate ${PROJECT_DIR}allure-results --clean -o ${PROJECT_DIR}allure-report"
}
}
}
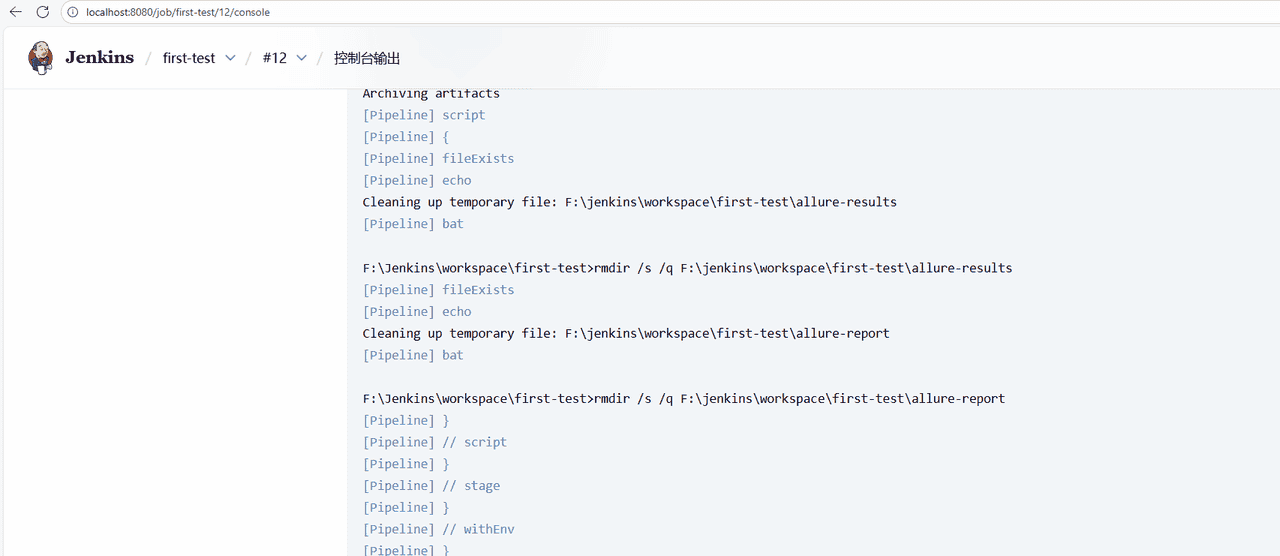
post {
always {
// 归档 Allure 报告和日志
allure includeProperties: false, jdk: '', results: [[path: "${PROJECT_DIR}allure-results"]]
archiveArtifacts artifacts: "allure-report/**/*", allowEmptyArchive: true
// 清理临时文件
script {
def tmpFiles = ["${PROJECT_DIR}allure-results", "${PROJECT_DIR}allure-report"]
tmpFiles.each { file ->
if (fileExists("${file}")) {
echo "Cleaning up temporary file: ${file}"
bat "rmdir /s /q ${file}"
} else {
echo "Temporary file ${file} does not exist."
}
}
}
}
}
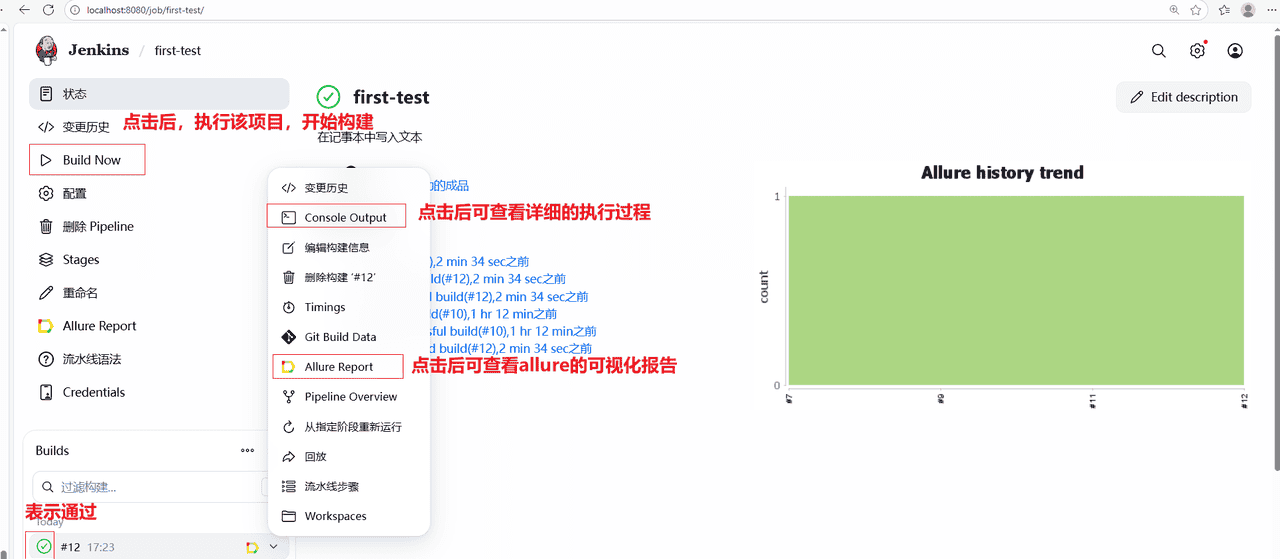
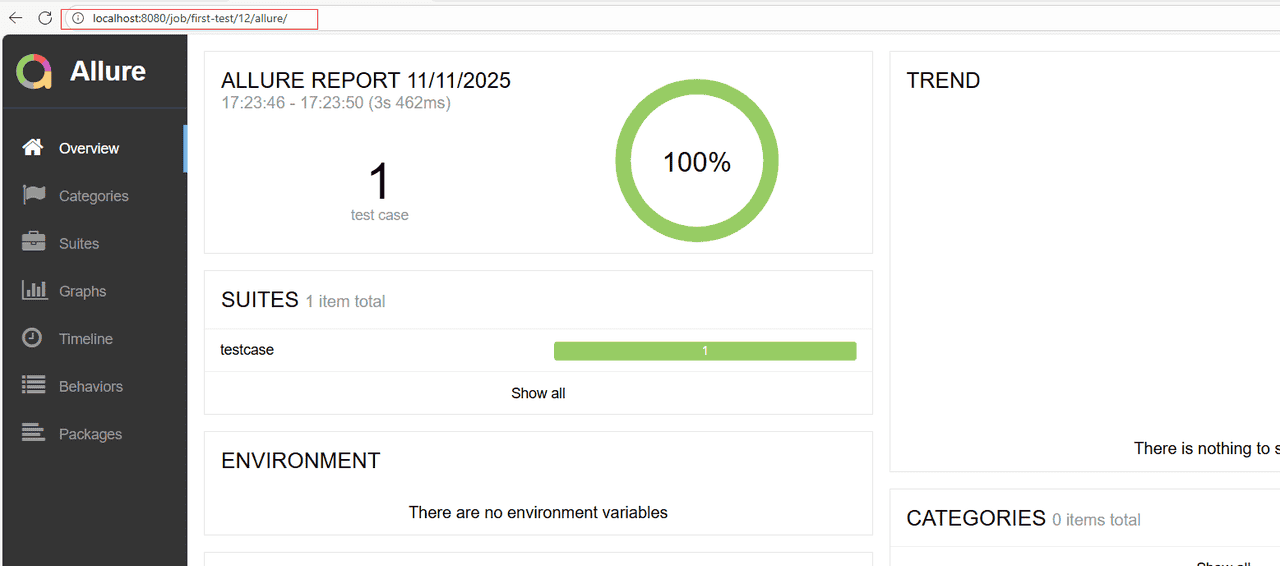
}七、执行构建任务,查看构建结果


暂无评论内容